Cambiar la posición de UIBarButtonItem en UINavigationBar
¿Cómo puedo cambiar la posición de un UIBarButtonItem en una UINavigationBar? Me gustaría que mi botón sea aproximadamente 5px más alto que su posición normal.
18 answers
No hay una manera particularmente buena de hacer esto. Su mejor apuesta si realmente debe es subclase UINavigationBar, y anular layoutSubviews para llamar [super layoutSubviews] y luego encontrar y reposicionar la vista del botón.
Warning: date(): Invalid date.timezone value 'Europe/Kyiv', we selected the timezone 'UTC' for now. in /var/www/agent_stack/data/www/ajaxhispano.com/template/agent.layouts/content.php on line 61
2011-04-28 02:16:43
Este código crea un botón atrás para UINavigationBar con el fondo de la imagen y la posición personalizada. El truco es crear una vista intermedia y modificar sus límites.
UIButton *backBtn = [UIButton buttonWithType:UIButtonTypeCustom];
UIImage *backBtnImage = [UIImage imageNamed:@"btn-back"];
UIImage *backBtnImagePressed = [UIImage imageNamed:@"btn-back-pressed"];
[backBtn setBackgroundImage:backBtnImage forState:UIControlStateNormal];
[backBtn setBackgroundImage:backBtnImagePressed forState:UIControlStateHighlighted];
[backBtn addTarget:self action:@selector(goBack) forControlEvents:UIControlEventTouchUpInside];
backBtn.frame = CGRectMake(0, 0, 63, 33);
UIView *backButtonView = [[UIView alloc] initWithFrame:CGRectMake(0, 0, 63, 33)];
backButtonView.bounds = CGRectOffset(backButtonView.bounds, -14, -7);
[backButtonView addSubview:backBtn];
UIBarButtonItem *backButton = [[UIBarButtonItem alloc] initWithCustomView:backButtonView];
self.navigationItem.leftBarButtonItem = backButton;
Warning: date(): Invalid date.timezone value 'Europe/Kyiv', we selected the timezone 'UTC' for now. in /var/www/agent_stack/data/www/ajaxhispano.com/template/agent.layouts/content.php on line 61
2012-09-23 17:52:20
Solucioné usando transform y vista personalizada:
(Swift)
  // create the button
  let suggestImage  = UIImage(named: "tab-item-popcorn-on")!.imageWithRenderingMode(.AlwaysOriginal)
  let suggestButton = UIButton(frame: CGRectMake(0, 0, 40, 40))
  suggestButton.setBackgroundImage(suggestImage, forState: .Normal)
  suggestButton.addTarget(self, action: Selector("suggesMovie:"), forControlEvents:.TouchUpInside)

  // here where the magic happens, you can shift it where you like
  suggestButton.transform = CGAffineTransformMakeTranslation(10, 0)

  // add the button to a container, otherwise the transform will be ignored
  let suggestButtonContainer = UIView(frame: suggestButton.frame)
  suggestButtonContainer.addSubview(suggestButton)
  let suggestButtonItem = UIBarButtonItem(customView: suggestButtonContainer)

  // add button shift to the side
  navigationItem.rightBarButtonItem = suggestButtonItem
Warning: date(): Invalid date.timezone value 'Europe/Kyiv', we selected the timezone 'UTC' for now. in /var/www/agent_stack/data/www/ajaxhispano.com/template/agent.layouts/content.php on line 61
2014-12-17 14:59:48
Para aquellos de ustedes desarrollando para iOS 5 que tropezaron con esto y se desanimaron... Prueba algo como esto:
float my_offset_plus_or_minus = 3.0f;

UIBarButtonItem * item = [[UIBarButtonItem alloc] initWithTitle:@"title"
                                                          style:UIBarButtonItemStyleDone
                                                          target:someObject action:@selector(someMessage)];

[item setBackgroundVerticalPositionAdjustment:my_offset_plus_or_minus forBarMetrics:UIBarMetricsDefault];
Warning: date(): Invalid date.timezone value 'Europe/Kyiv', we selected the timezone 'UTC' for now. in /var/www/agent_stack/data/www/ajaxhispano.com/template/agent.layouts/content.php on line 61
2014-09-30 01:43:24
La mejor manera es subclasificar tu UINavigationBar, como se describe aquí: https://stackoverflow.com/a/17434530/1351190
Aquí está mi ejemplo:
#define NAVIGATION_BTN_MARGIN 5

@implementation NewNavigationBar

- (void)layoutSubviews {

    [super layoutSubviews];

    UINavigationItem *navigationItem = [self topItem];

    UIView *subview = [[navigationItem rightBarButtonItem] customView];

    if (subview) {

        CGRect subviewFrame = subview.frame;
        subviewFrame.origin.x = self.frame.size.width - subview.frame.size.width - NAVIGATION_BTN_MARGIN;
        subviewFrame.origin.y = (self.frame.size.height - subview.frame.size.height) / 2;

        [subview setFrame:subviewFrame];
    }

    subview = [[navigationItem leftBarButtonItem] customView];

    if (subview) {

        CGRect subviewFrame = subview.frame;
        subviewFrame.origin.x = NAVIGATION_BTN_MARGIN;
        subviewFrame.origin.y = (self.frame.size.height - subview.frame.size.height) / 2;

        [subview setFrame:subviewFrame];
    }
}

@end
Espero que ayude.
Warning: date(): Invalid date.timezone value 'Europe/Kyiv', we selected the timezone 'UTC' for now. in /var/www/agent_stack/data/www/ajaxhispano.com/template/agent.layouts/content.php on line 61
2017-05-23 11:47:31
Pruebe el siguiente código,
UIBarButtonItem *button = [[UIBarButtonItem alloc] initWithTitle:@"Logout" style:UIBarButtonItemStyleDone target:self action:nil];
[button setBackgroundVerticalPositionAdjustment:-20.0f forBarMetrics:UIBarMetricsDefault];
[[self navigationItem] setRightBarButtonItem:button];
Se usa para cambiar la posición 'y' en este código. Cambie el valor' y ' (aquí es -20.0 f) según su requisito. Si el valor es positivo, bajará la posición del botón. Si el valor es negativo, subirá la posición del botón.
Warning: date(): Invalid date.timezone value 'Europe/Kyiv', we selected the timezone 'UTC' for now. in /var/www/agent_stack/data/www/ajaxhispano.com/template/agent.layouts/content.php on line 61
2012-12-04 09:33:20
Necesitaba configurar mi botón para estar más hacia la derecha. Así es como lo hice usando UIAppearance en Swift. Hay una propiedad de posición vertical allí, así que imagino que puede ajustar en cualquier dirección.
UIBarButtonItem.appearance().setTitlePositionAdjustment(UIOffset.init(horizontal: 15, vertical: 0), forBarMetrics: UIBarMetrics.Default)
Esto me parece mucho menos invasivo que jugar con el marco directamente o agregar subviews personalizadas.
Warning: date(): Invalid date.timezone value 'Europe/Kyiv', we selected the timezone 'UTC' for now. in /var/www/agent_stack/data/www/ajaxhispano.com/template/agent.layouts/content.php on line 61
2015-12-14 12:13:37
Si simplemente está utilizando una imagen y NO el chrome predeterminado, puede usar inserciones de imagen negativas (establecidas en el inspector de tamaño) para mover su imagen alrededor de dentro de el UIBarButtonItem (útil porque por defecto el relleno horizontal puede resultar en que la imagen esté más adentro de lo que desea). Puede utilizar las inserciones de imagen para colocar la imagen fuera de los límites del UIBarButtonItem, así, y toda la vecindad del botón del lado izquierdo es tappable, por lo que no tiene para preocuparse por asegurarse de que está posicionado cerca de un objetivo de grifo. (al menos, dentro de lo razonable.)
Warning: date(): Invalid date.timezone value 'Europe/Kyiv', we selected the timezone 'UTC' for now. in /var/www/agent_stack/data/www/ajaxhispano.com/template/agent.layouts/content.php on line 61
2012-10-19 13:50:57
La mejor solución que pude encontrar es inicializar un UIBarButtonItem con una subview que incluye espacio adicional a la izquierda/derecha. De esta manera no tendrás que preocuparte por subclasificar, y cambiar el diseño de otros elementos dentro de la barra de navegación, como el título.
Por ejemplo, para mover un botón 14 puntos a la izquierda:
UIView *containerView = [[UIView alloc] initWithFrame:CGRectMake(0, 0, image.size.width + 14, image.size.height)];
UIButton* button = [UIButton buttonWithType:UIButtonTypeCustom];
button.frame = CGRectMake(-14, 0, image.size.width, image.size.height);
[button setImage:image forState:UIControlStateNormal];
[button addTarget:target action:action forControlEvents:UIControlEventTouchUpInside];
[containerView addSubview:button];

UIButton* button2 = [UIButton buttonWithType:UIButtonTypeCustom];
button2.frame = CGRectMake(0, 0, image.size.width + 14, image.size.height);
[button2 addTarget:target action:action forControlEvents:UIControlEventTouchUpInside];
[containerView addSubview:button2];

UIBarButtonItem* item = [[[self alloc] initWithCustomView:containerView] autorelease];
Warning: date(): Invalid date.timezone value 'Europe/Kyiv', we selected the timezone 'UTC' for now. in /var/www/agent_stack/data/www/ajaxhispano.com/template/agent.layouts/content.php on line 61
2013-08-12 15:56:13
- Swift 3
- altura de la barra de navegación personalizada
- no hay salto de título
Paso 1: Establecer la posición del título mediante la API de apariencia. Por ejemplo, en AppDelegate didFinishLaunchingWithOptions
UINavigationBar.appearance().setTitleVerticalPositionAdjustment(-7, for: .default)
Paso 2: Subclase UINavigationBar
class YourNavigationBar: UINavigationBar {

    let YOUR_NAV_BAR_HEIGHT = 60

    override func sizeThatFits(_ size: CGSize) -> CGSize {
        return CGSize(width: UIScreen.main.bounds.width,
                     height: YOUR_NAV_BAR_HEIGHT)
    }

    override func layoutSubviews() {
        super.layoutSubviews()

        let navigationItem = self.topItem

        for subview in subviews {
            if  subview == navigationItem?.leftBarButtonItem?.customView ||
                subview == navigationItem?.rightBarButtonItem?.customView {
                subview.center = CGPoint(x: subview.center.x, y: YOUR_NAV_BAR_HEIGHT / 2)
            }
        }
    }
}
Warning: date(): Invalid date.timezone value 'Europe/Kyiv', we selected the timezone 'UTC' for now. in /var/www/agent_stack/data/www/ajaxhispano.com/template/agent.layouts/content.php on line 61
2017-05-30 09:49:06
Como dijo @Anomie, necesitamos subclase UINavigationBar, y anular layoutSubviews().
Esto colocará todos los elementos del botón de la barra derecha firmemente unidos al lado derecho de la barra de navegación (en lugar de estar ligeramente ajustado a la izquierda por defecto):
class AdjustedNavigationBar: UINavigationBar {

    override func layoutSubviews() {
        super.layoutSubviews()

        if let rightItems = topItem?.rightBarButtonItems where rightItems.count > 1 {
            for i in 0..<rightItems.count {
                let barButtonItem = rightItems[i]
                if let customView = barButtonItem.customView {
                    let frame = customView.frame
                    customView.frame = CGRect(x: UIApplication.sharedApplication().windows.last!.bounds.size.width-CGFloat(i+1)*44, y: frame.origin.y, width: frame.size.width, height: frame.size.height)
                }

            }
        }
    }
}
El único lugar para establecer la propiedad UINavigationBar de UINavigationController está en su init (), así:
let controllerVC = UINavigationController(navigationBarClass: AdjustedNavigationBar.self, toolbarClass: nil)
controllerVC.viewControllers = [UIViewController()]
La segunda línea establece el controlador de vista raíz de UINavigationController.
(Puesto que no se puede establecer a través init(rootViewController:)
Warning: date(): Invalid date.timezone value 'Europe/Kyiv', we selected the timezone 'UTC' for now. in /var/www/agent_stack/data/www/ajaxhispano.com/template/agent.layouts/content.php on line 61
2015-10-14 09:47:54
Swift 3.1
let cancelBarButtonItem = UIBarButtonItem()
cancelBarButtonItem.setBackgroundVerticalPositionAdjustment(4, for: .default)
vc.navigationItem.setLeftBarButton(cancelBarButtonItem, animated: true)
Warning: date(): Invalid date.timezone value 'Europe/Kyiv', we selected the timezone 'UTC' for now. in /var/www/agent_stack/data/www/ajaxhispano.com/template/agent.layouts/content.php on line 61
2017-04-13 08:53:03
Aquí está la solución de Adriano usando Swift 3. Fue la única solución que funcionó para mí y probé varias.
  let suggestImage  = UIImage(named: "menu.png")!
    let suggestButton = UIButton(frame: CGRect(x:0, y:0, width:34, height:20))
    suggestButton.setBackgroundImage(suggestImage, for: .normal)
    suggestButton.addTarget(self, action: #selector(self.showPopover(sender:)), for:.touchUpInside)
    suggestButton.transform = CGAffineTransform(translationX: 0, y: -8)
    // add the button to a container, otherwise the transform will be ignored
    let suggestButtonContainer = UIView(frame: suggestButton.frame)
    suggestButtonContainer.addSubview(suggestButton)
    let suggestButtonItem = UIBarButtonItem(customView: suggestButtonContainer)
    // add button shift to the side
    navigationItem.leftBarButtonItem = suggestButtonItem
Warning: date(): Invalid date.timezone value 'Europe/Kyiv', we selected the timezone 'UTC' for now. in /var/www/agent_stack/data/www/ajaxhispano.com/template/agent.layouts/content.php on line 61
2017-08-22 19:45:54
En mi caso
-
Cambiar el marco de barButtonItem para personalizar espacios
Añadir, Eliminar barButtonItems dinámicamente.
-
Cambie los colores de tinte por contentOffset de tableview.y
Así


Si su destino mínimo es iOS 11, puede cambiar los marcos de barButton en el viewDidLayoutSubviews
override func viewDidLayoutSubviews() {
    super.viewDidLayoutSubviews()

    // Change the navigationBar item frames
    if let customView = wishButton.customView?.superview {
        customView.transform = CGAffineTransform(translationX: 7.0, y: 0)
    }

    if let customView = gourmetCountButton.customView?.superview {
        customView.transform = CGAffineTransform(translationX: 9.0, y: 0)
    }
}
Pero, solo funciona en iOS 11.
También intenté usar el espacio fijo. Pero no funcionó en múltiples elementos navigationBarButton.
 let space = UIBarButtonItem(barButtonSystemItem: .fixedSpace, target: nil, action: nil)
    space.width = -10
Por lo tanto, cambié el ancho de CustomView para ajustar el espacio horizontal.
Esta es una de las clases de mi barButtonItem
final class DetailShareBarButtonItem: UIBarButtonItem {

// MARK: - Value
// MARK: Public
***// Change the width to adjust space***
let button = UIButton(frame: CGRect(x: 0, y: 0, width: 32.0, height: 30.0))

override var tintColor: UIColor? {
    didSet {
        button.tintColor = tintColor
    }
}

required init?(coder aDecoder: NSCoder) {
    super.init(coder: aDecoder)
    setButton()
}

required override init() {
    super.init()
    setButton()
}


// MARK: - Function
// MARK: Private
private func setButton() {
    // Button
    button.setImage( #imageLiteral(resourceName: "navibarIcShare02White").withRenderingMode(.alwaysTemplate), for: .normal)
    button.tintColor              = .white
    button.imageEdgeInsets        = UIEdgeInsetsMake(0, 1.0, 1.0, 0)
    button.imageView?.contentMode = .scaleAspectFill

    let containerView = UIView(frame: button.bounds)
    containerView.backgroundColor = .clear
    containerView.addSubview(button)
    customView = containerView
}
}
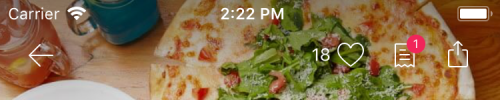
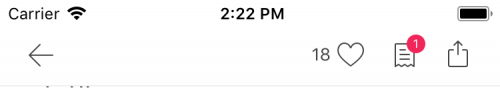
Este es el resultado.
He probado en iOS 9 ~ 11, (Swift 4)

Warning: date(): Invalid date.timezone value 'Europe/Kyiv', we selected the timezone 'UTC' for now. in /var/www/agent_stack/data/www/ajaxhispano.com/template/agent.layouts/content.php on line 61
2018-01-30 05:58:59
Init UIBarButtonItem con vista personalizada y sobrecarga layoutSubviews en vista personalizada, así
-(void) layoutSubviews {
  [super layoutSubviews];
  CGRect frame = self.frame;
  CGFloat offsetY = 5;
  frame.origin.y = (44 - frame.size.height) / 2 - offsetY;
  self.frame = frame;
}
Warning: date(): Invalid date.timezone value 'Europe/Kyiv', we selected the timezone 'UTC' for now. in /var/www/agent_stack/data/www/ajaxhispano.com/template/agent.layouts/content.php on line 61
2017-01-17 06:58:07
Siempre puede hacer ajustes usando inserciones en el botón. Por ejemplo,
UIButton *toggleBtn =  [UIButton buttonWithType:UIButtonTypeCustom];
[toggleBtn setFrame:CGRectMake(0, 0, 20, 20)];
[toggleBtn addTarget:self action:@selector(toggleView) forControlEvents:UIControlEventTouchUpInside];

[toggleBtn setImageEdgeInsets:((IS_IPAD)? UIEdgeInsetsMake(0,-18, 0, 6) : UIEdgeInsetsMake(0, -3, 0, -3))];

UIBarButtonItem *toggleBtnItem = [[UIBarButtonItem alloc] initWithCustomView: toggleBtn];
self.navigationItem.rightBarButtonItems = [NSArray arrayWithObjects:searchBtnItem, toggleBtnItem, nil];
Funciona para mí.
Warning: date(): Invalid date.timezone value 'Europe/Kyiv', we selected the timezone 'UTC' for now. in /var/www/agent_stack/data/www/ajaxhispano.com/template/agent.layouts/content.php on line 61
2017-01-19 06:28:04
Aquí hay una solución simple que fue suficiente para mis necesidades. He añadido un botón de información en el lado derecho de la UINavigationBar, pero por defecto se encuentra demasiado cerca del borde. Al extender el ancho del marco, pude crear el espacio adicional necesario a la derecha.
 UIButton *info = [UIButton buttonWithType:UIButtonTypeInfoLight];
 CGRect frame = info.frame;
 frame.size.width += 20;
 info.frame = frame;
 myNavigationItem.rightBarButtonItem = [[[UIBarButtonItem alloc]initWithCustomView:info]autorelease];
Warning: date(): Invalid date.timezone value 'Europe/Kyiv', we selected the timezone 'UTC' for now. in /var/www/agent_stack/data/www/ajaxhispano.com/template/agent.layouts/content.php on line 61
2011-08-26 17:29:53
Encontré la solución de este problema haciendo ajustes en las inserciones de Borde de la imagen del botón personalizado. Tuve el requisito en la aplicación para aumentar la altura de la barra de navegación y después de aumentar la altura hace que las imágenes rightBarButtonItem y leftBarButtonItem problema sin posicionar.
Encuentre el siguiente código: -
UIImage *image = [[UIImage imageNamed:@"searchbar.png"];
UIButton* searchbutton = [UIButton buttonWithType:UIButtonTypeCustom];
[searchbutton addTarget:self action:@selector(searchBar:) forControlEvents:UIControlEventTouchUpInside];
searchbutton.frame = CGRectMake(0,0,22, 22);
[searchbutton setImage:image forState:UIControlStateNormal];
[searchbutton setImageEdgeInsets:UIEdgeInsetsMake(-50, 0,50, 0)];
// Make BarButton Item
 UIBarButtonItem *navItem = [[UIBarButtonItem alloc] initWithCustomView:searchbutton];
self.navigationItem.rightBarButtonItem = navItem;
Espero que esto ayude a alguien.
Warning: date(): Invalid date.timezone value 'Europe/Kyiv', we selected the timezone 'UTC' for now. in /var/www/agent_stack/data/www/ajaxhispano.com/template/agent.layouts/content.php on line 61
2017-09-12 07:25:07