Actionbar icono de conteo de notificaciones (insignia) como Google tiene
¿Hay una insignia estándar de Android o un método para mostrar el icono de notificación de la barra de acciones con un recuento como en los ejemplos de Google?
Si no, entonces ¿cuál es la mejor manera de hacerlo?
Soy nuevo en Android, por favor ayuda.
8 answers
No estoy seguro si esta es la mejor solución o no, pero es lo que necesito.
Por favor dime si sabes lo que es necesario cambiar para un mejor rendimiento o calidad. En mi caso, tengo un botón.
Elemento Personalizado en mi menú principal.xml
<item
    android:id="@+id/badge"
    android:actionLayout="@layout/feed_update_count"
    android:icon="@drawable/shape_notification"
    android:showAsAction="always">
</item>
Dibujable de forma personalizada (cuadrado de fondo) - shape_notification.xml
<?xml version="1.0" encoding="utf-8"?>
<shape xmlns:android="http://schemas.android.com/apk/res/android"
   android:shape="rectangle">
    <stroke android:color="#22000000" android:width="2dp"/>
    <corners android:radius="5dp" />
    <solid android:color="#CC0001"/>
</shape>
Diseño para mi vista - feed_update_count.xml
<?xml version="1.0" encoding="utf-8"?>
<Button xmlns:android="http://schemas.android.com/apk/res/android"
     android:id="@+id/notif_count"
     android:layout_width="wrap_content"
     android:layout_height="wrap_content"
     android:minWidth="32dp"
     android:minHeight="32dp"
     android:background="@drawable/shape_notification"
     android:text="0"
     android:textSize="16sp"
     android:textColor="@android:color/white"
     android:gravity="center"
     android:padding="2dp"
     android:singleLine="true">
</Button>
MainActivity-configuración y actualización de mi vista
static Button notifCount;
static int mNotifCount = 0;

@Override
public boolean onCreateOptionsMenu(Menu menu) {
    MenuInflater inflater = getSupportMenuInflater();
    inflater.inflate(R.menu.main, menu);

    View count = menu.findItem(R.id.badge).getActionView();
    notifCount = (Button) count.findViewById(R.id.notif_count);
    notifCount.setText(String.valueOf(mNotifCount));
    return super.onCreateOptionsMenu(menu);
}

private void setNotifCount(int count){
    mNotifCount = count;
    invalidateOptionsMenu();
}
Warning: date(): Invalid date.timezone value 'Europe/Kyiv', we selected the timezone 'UTC' for now. in /var/www/agent_stack/data/www/ajaxhispano.com/template/agent.layouts/content.php on line 61
2015-08-09 05:02:17
Simplemente compartiré mi código en caso de que alguien quiera algo como esto:
-
Layout / menu / menu_actionbar.xml
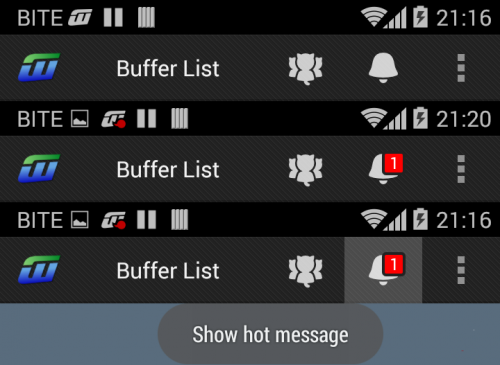
<?xml version="1.0" encoding="utf-8"?> <menu xmlns:android="http://schemas.android.com/apk/res/android"> ... <item android:id="@+id/menu_hotlist" android:actionLayout="@layout/action_bar_notifitcation_icon" android:showAsAction="always" android:icon="@drawable/ic_bell" android:title="@string/hotlist" /> ... </menu> -
Layout / action_bar_notifitcation_icon.xml
Nota estilo y android:clickable propiedades. estos hacen que el diseño del tamaño de un botón y hacen que el fondo gris cuando se toca.
<?xml version="1.0" encoding="utf-8"?> <RelativeLayout xmlns:android="http://schemas.android.com/apk/res/android" android:layout_width="wrap_content" android:layout_height="fill_parent" android:orientation="vertical" android:gravity="center" android:layout_gravity="center" android:clickable="true" style="@android:style/Widget.ActionButton"> <ImageView android:id="@+id/hotlist_bell" android:src="@drawable/ic_bell" android:layout_width="wrap_content" android:layout_height="wrap_content" android:gravity="center" android:layout_margin="0dp" android:contentDescription="bell" /> <TextView xmlns:android="http://schemas.android.com/apk/res/android" android:id="@+id/hotlist_hot" android:layout_width="wrap_content" android:minWidth="17sp" android:textSize="12sp" android:textColor="#ffffffff" android:layout_height="wrap_content" android:gravity="center" android:text="@null" android:layout_alignTop="@id/hotlist_bell" android:layout_alignRight="@id/hotlist_bell" android:layout_marginRight="0dp" android:layout_marginTop="3dp" android:paddingBottom="1dp" android:paddingRight="4dp" android:paddingLeft="4dp" android:background="@drawable/rounded_square"/> </RelativeLayout> -
Drawable-xhdpi / ic_bell.png
Una imagen de 64x64 píxeles con paddings de 10 píxeles de ancho desde todos los lados. Se supone que tienes 8 píxeles de ancho, pero me parece que la mayoría de los elementos predeterminados son ligeramente más pequeños que eso. Por supuesto, querrás usar diferentes tamaños para diferentes densidades.
-
Drawable / rounded_square.xml
Aquí, #ff222222 (color #222222 con alfa #ff (totalmente visible)) es el color de fondo de mi Acción Bar.
<?xml version="1.0" encoding="utf-8"?> <shape xmlns:android="http://schemas.android.com/apk/res/android" android:shape="rectangle"> <corners android:radius="2dp" /> <solid android:color="#ffff0000" /> <stroke android:color="#ff222222" android:width="2dp"/> </shape> -
Com / ubergeek42 / WeechatAndroid / WeechatActivity.java
Aquí lo hacemos clickable y actualizable! Creé un oyente abstracto que proporciona la creación de Toast en onLongClick, el código fue tomado de las fuentes de ActionBarSherlock.
private int hot_number = 0;
private TextView ui_hot = null;

@Override public boolean onCreateOptionsMenu(final Menu menu) {
    MenuInflater menuInflater = getSupportMenuInflater();
    menuInflater.inflate(R.menu.menu_actionbar, menu);
    final View menu_hotlist = menu.findItem(R.id.menu_hotlist).getActionView();
    ui_hot = (TextView) menu_hotlist.findViewById(R.id.hotlist_hot);
    updateHotCount(hot_number);
    new MyMenuItemStuffListener(menu_hotlist, "Show hot message") {
        @Override
        public void onClick(View v) {
            onHotlistSelected();
        }
    };
    return super.onCreateOptionsMenu(menu);
}

// call the updating code on the main thread,
// so we can call this asynchronously
public void updateHotCount(final int new_hot_number) {
    hot_number = new_hot_number;
    if (ui_hot == null) return;
    runOnUiThread(new Runnable() {
        @Override
        public void run() {
            if (new_hot_number == 0)
                ui_hot.setVisibility(View.INVISIBLE);
            else {
                ui_hot.setVisibility(View.VISIBLE);
                ui_hot.setText(Integer.toString(new_hot_number));
            }
        }
    });
}

static abstract class MyMenuItemStuffListener implements View.OnClickListener, View.OnLongClickListener {
    private String hint;
    private View view;

    MyMenuItemStuffListener(View view, String hint) {
        this.view = view;
        this.hint = hint;
        view.setOnClickListener(this);
        view.setOnLongClickListener(this);
    }

    @Override abstract public void onClick(View v);

    @Override public boolean onLongClick(View v) {
        final int[] screenPos = new int[2];
        final Rect displayFrame = new Rect();
        view.getLocationOnScreen(screenPos);
        view.getWindowVisibleDisplayFrame(displayFrame);
        final Context context = view.getContext();
        final int width = view.getWidth();
        final int height = view.getHeight();
        final int midy = screenPos[1] + height / 2;
        final int screenWidth = context.getResources().getDisplayMetrics().widthPixels;
        Toast cheatSheet = Toast.makeText(context, hint, Toast.LENGTH_SHORT);
        if (midy < displayFrame.height()) {
            cheatSheet.setGravity(Gravity.TOP | Gravity.RIGHT,
                    screenWidth - screenPos[0] - width / 2, height);
        } else {
            cheatSheet.setGravity(Gravity.BOTTOM | Gravity.CENTER_HORIZONTAL, 0, height);
        }
        cheatSheet.show();
        return true;
    }
}
Warning: date(): Invalid date.timezone value 'Europe/Kyiv', we selected the timezone 'UTC' for now. in /var/www/agent_stack/data/www/ajaxhispano.com/template/agent.layouts/content.php on line 61
2014-08-22 19:08:07
Solo para añadir. Si alguien quiere implementar una burbuja de círculo lleno, aquí está el código (nómbralo bage_circle.xml):
<shape xmlns:android="http://schemas.android.com/apk/res/android"
    android:shape="ring"
    android:useLevel="false"
    android:thickness="9dp"
    android:innerRadius="0dp"
    >

    <solid
        android:color="#F00"
        />
    <stroke
        android:width="1dip"
        android:color="#FFF" />

    <padding
        android:top="2dp"
        android:bottom="2dp"/>

</shape>
Es posible que tenga que ajustar el grosor de acuerdo con sus necesidades.

EDITAR:
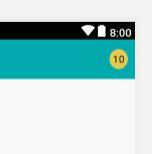
Aquí está el diseño para el botón (nómbralo badge_layout.xml):
<RelativeLayout xmlns:android="http://schemas.android.com/apk/res/android"
    android:layout_width="wrap_content"
    android:layout_height="wrap_content">

    <com.joanzapata.iconify.widget.IconButton
        android:layout_width="44dp"
        android:layout_height="44dp"
        android:textSize="24sp"
        android:textColor="@color/white"
        android:background="@drawable/action_bar_icon_bg"
        android:id="@+id/badge_icon_button"/>

    <TextView
        android:id="@+id/badge_textView"
        android:layout_width="wrap_content"
        android:layout_height="wrap_content"
        android:layout_alignTop="@id/badge_icon_button"
        android:layout_alignRight="@id/badge_icon_button"
        android:layout_alignEnd="@id/badge_icon_button"
        android:text="10"
        android:paddingEnd="8dp"
        android:paddingRight="8dp"
        android:paddingLeft="8dp"
        android:gravity="center"
        android:textColor="#FFF"
        android:textSize="11sp"
        android:background="@drawable/badge_circle"/>
</RelativeLayout>
En el menú crear elemento:
<item
        android:id="@+id/menu_messages"
        android:showAsAction="always"
        android:actionLayout="@layout/badge_layout"/>
En onCreateOptionsMenu obtener referencia al elemento de menú:
    itemMessages = menu.findItem(R.id.menu_messages);

    badgeLayout = (RelativeLayout) itemMessages.getActionView();
    itemMessagesBadgeTextView = (TextView) badgeLayout.findViewById(R.id.badge_textView);
    itemMessagesBadgeTextView.setVisibility(View.GONE); // initially hidden

    iconButtonMessages = (IconButton) badgeLayout.findViewById(R.id.badge_icon_button);
    iconButtonMessages.setText("{fa-envelope}");
    iconButtonMessages.setTextColor(getResources().getColor(R.color.action_bar_icon_color_disabled));

    iconButtonMessages.setOnClickListener(new View.OnClickListener() {
        @Override
        public void onClick(View view) {
            if (HJSession.getSession().getSessionId() != null) {

                Intent intent = new Intent(getThis(), HJActivityMessagesContexts.class);
                startActivityForResult(intent, HJRequestCodes.kHJRequestCodeActivityMessages.ordinal());
            } else {
                showLoginActivity();
            }
        }
    });
Después de recibir la notificación de mensajes, establezca el recuento:
itemMessagesBadgeTextView.setText("" + count);
itemMessagesBadgeTextView.setVisibility(View.VISIBLE);
iconButtonMessages.setTextColor(getResources().getColor(R.color.white));
Este código utiliza Iconify-fontawesome.
compile 'com.joanzapata.iconify:android-iconify-fontawesome:2.1.+'
Warning: date(): Invalid date.timezone value 'Europe/Kyiv', we selected the timezone 'UTC' for now. in /var/www/agent_stack/data/www/ajaxhispano.com/template/agent.layouts/content.php on line 61
2016-03-17 10:20:06
No me gustan las soluciones basadas en ActionView ,
mi idea es:
- crear un diseño con
TextViewqueTextViewserá poblada por solicitud -
Cuando necesitas dibujar un
MenuItem:2.1. inflar la disposición
2.2. llamar
measure()&layout()(de lo contrarioviewserá 0px x 0px, es demasiado pequeño para la mayoría de los casos de uso)2.3. establece el texto
TextView2.4. hacer "captura de pantalla" de la vista
2.6. set
MenuItem's icono basado en mapa de bits creado en 2.4 ¡Beneficio!
Entonces, el resultado debería ser algo como

- crear diseño he aquí un ejemplo simple
<?xml version="1.0" encoding="utf-8"?>
<FrameLayout xmlns:android="http://schemas.android.com/apk/res/android"
    android:id="@+id/counterPanel"
    android:layout_width="32dp"
    android:layout_height="32dp"
    android:background="@drawable/ic_menu_gallery">
    <RelativeLayout
        android:id="@+id/counterValuePanel"
        android:layout_width="wrap_content"
        android:layout_height="wrap_content" >

        <ImageView
            android:id="@+id/counterBackground"
            android:layout_width="wrap_content"
            android:layout_height="wrap_content"
            android:background="@drawable/unread_background" />

        <TextView
            android:id="@+id/count"
            android:layout_width="wrap_content"
            android:layout_height="wrap_content"
            android:text="1"
            android:textSize="8sp"
            android:layout_centerInParent="true"
            android:textColor="#FFFFFF" />
    </RelativeLayout>
</FrameLayout>
@drawable/unread_background es que el fondo verde TextView,
@drawable/ic_menu_gallery no es realmente necesario aquí, es solo para previsualizar el resultado del diseño en IDE.
-
Añadir código en
onCreateOptionsMenu/onPrepareOptionsMenu@Override public boolean onCreateOptionsMenu(Menu menu) { getMenuInflater().inflate(R.menu.menu_main, menu); MenuItem menuItem = menu.findItem(R.id.testAction); menuItem.setIcon(buildCounterDrawable(count, R.drawable.ic_menu_gallery)); return true; } -
Implementar el método build-the-icon:
private Drawable buildCounterDrawable(int count, int backgroundImageId) {
    LayoutInflater inflater = LayoutInflater.from(this);
    View view = inflater.inflate(R.layout.counter_menuitem_layout, null);
    view.setBackgroundResource(backgroundImageId);

    if (count == 0) {
        View counterTextPanel = view.findViewById(R.id.counterValuePanel);
        counterTextPanel.setVisibility(View.GONE);
    } else {
        TextView textView = (TextView) view.findViewById(R.id.count);
        textView.setText("" + count);
    }

    view.measure(
            View.MeasureSpec.makeMeasureSpec(0, View.MeasureSpec.UNSPECIFIED),
            View.MeasureSpec.makeMeasureSpec(0, View.MeasureSpec.UNSPECIFIED));
    view.layout(0, 0, view.getMeasuredWidth(), view.getMeasuredHeight());

    view.setDrawingCacheEnabled(true);
    view.setDrawingCacheQuality(View.DRAWING_CACHE_QUALITY_HIGH);
    Bitmap bitmap = Bitmap.createBitmap(view.getDrawingCache());
    view.setDrawingCacheEnabled(false);

    return new BitmapDrawable(getResources(), bitmap);
}
El completo el código está aquí: https://github.com/cvoronin/ActionBarMenuItemCounter
Warning: date(): Invalid date.timezone value 'Europe/Kyiv', we selected the timezone 'UTC' for now. in /var/www/agent_stack/data/www/ajaxhispano.com/template/agent.layouts/content.php on line 61
2016-07-27 11:35:08
Ok, para @AndrewS solución para trabajar con v7 appCompat biblioteca:
<menu
    xmlns:android="http://schemas.android.com/apk/res/android"
    xmlns:someNamespace="http://schemas.android.com/apk/res-auto" >

    <item
        android:id="@+id/saved_badge"
        someNamespace:showAsAction="always"
        android:icon="@drawable/shape_notification" />

</menu>
.
@Override
public void onCreateOptionsMenu(Menu menu, MenuInflater inflater) {
    super.onCreateOptionsMenu(menu, inflater);
    menu.clear();
    inflater.inflate(R.menu.main, menu);

    MenuItem item = menu.findItem(R.id.saved_badge);
    MenuItemCompat.setActionView(item, R.layout.feed_update_count);
    View view = MenuItemCompat.getActionView(item);
    notifCount = (Button)view.findViewById(R.id.notif_count);
    notifCount.setText(String.valueOf(mNotifCount));
}

private void setNotifCount(int count){
    mNotifCount = count;
    supportInvalidateOptionsMenu();
}
El resto del código es el mismo.
Warning: date(): Invalid date.timezone value 'Europe/Kyiv', we selected the timezone 'UTC' for now. in /var/www/agent_stack/data/www/ajaxhispano.com/template/agent.layouts/content.php on line 61
2014-05-04 02:34:26
Trate de mirar las respuestas a estas preguntas, particularmente la segunda que tiene un código de ejemplo:
Cómo implementar valores dinámicos en el elemento de menú en Android
Cómo obtener texto en un icono de ActionBar?
Por lo que veo, necesitarás crear tu propia implementación personalizada ActionView. Una alternativa podría ser un custom Drawable. Tenga en cuenta que no parece haber una implementación nativa de un recuento de notificaciones para la Barra de acciones.
EDITAR: La respuesta estaba buscando, con el código: Vista de notificación personalizada con implementación de ejemplo
Warning: date(): Invalid date.timezone value 'Europe/Kyiv', we selected the timezone 'UTC' for now. in /var/www/agent_stack/data/www/ajaxhispano.com/template/agent.layouts/content.php on line 61
2017-05-23 12:34:37
Cuando se utiliza la barra de herramientas:
....
private void InitToolbar() {
    toolbar = (Toolbar) findViewById(R.id.my_awesome_toolbar);
    toolbartitle = (TextView) findViewById(R.id.titletool);
    toolbar.inflateMenu(R.menu.show_post);
    toolbar.setOnMenuItemClickListener(this);
    Menu menu = toolbar.getMenu();
    MenuItem menu_comments = menu.findItem(R.id.action_comments);
    MenuItemCompat
            .setActionView(menu_comments, R.layout.menu_commentscount);
    View v = MenuItemCompat.getActionView(menu_comments);
    v.setOnClickListener(new OnClickListener() {

        @Override
        public void onClick(View arg0) {
            // Your Action
        }
    });
    comment_count = (TextView) v.findViewById(R.id.count);
}
Y en tu llamada de carga de datos refreshMenu ():
private void refreshMenu() {
    comment_count.setVisibility(View.VISIBLE);
    comment_count.setText("" + post_data.getComment_count());
}
Warning: date(): Invalid date.timezone value 'Europe/Kyiv', we selected the timezone 'UTC' for now. in /var/www/agent_stack/data/www/ajaxhispano.com/template/agent.layouts/content.php on line 61
2015-07-09 08:23:51
En lugar de administrar la forma personalizada y el elemento de diseño, ¿por qué no usar el mecanismo incorporado de Android?
Puede usar el estilo de insignia en TextView y usar el estilo personalizado según su tema.
Saludos. :)
        <TextView
                android:id="@+id/fabCounter"
                style="@style/Widget.Design.FloatingActionButton"
                android:layout_width="wrap_content"
                android:layout_height="wrap_content"
                android:layout_alignParentEnd="true"
                android:layout_centerVertical="true"
                android:layout_marginEnd="10dp"
                android:padding="5dp"
                android:text="10"
                android:textColor="@android:color/black"
                android:textSize="14sp" />
Warning: date(): Invalid date.timezone value 'Europe/Kyiv', we selected the timezone 'UTC' for now. in /var/www/agent_stack/data/www/ajaxhispano.com/template/agent.layouts/content.php on line 61
2017-11-18 05:32:24